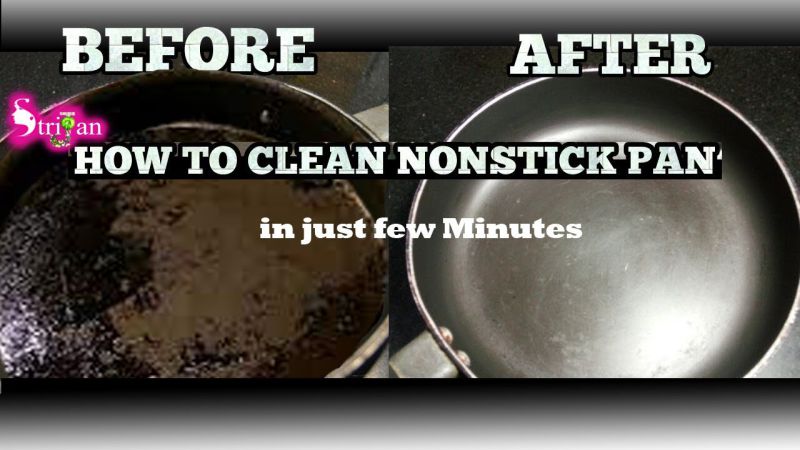
In this article, I will guide you on How To Remove Burnt On Oil From Non Stick Pan which is very helpful for you.
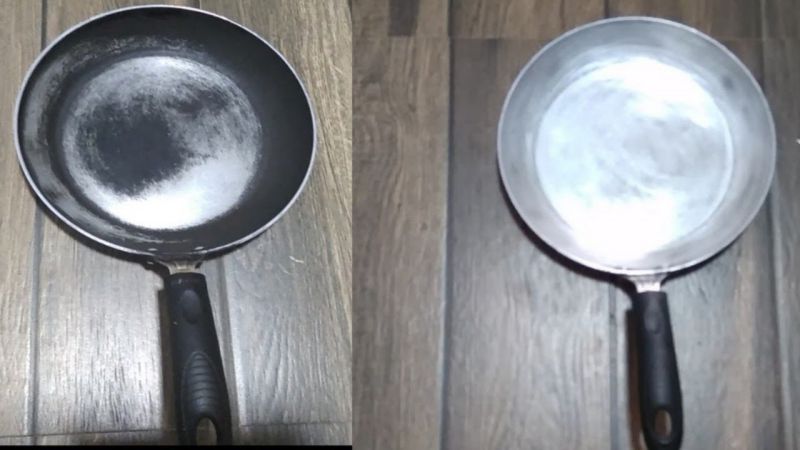
Non-stick pans are useful utensils in every kitchen. They make cooking and cleaning up a breeze, even with their non-stick surface. However, burnt-on oil can be a common occurrence. Fortunately, there are easy and safe ways to remove burnt-on oil from non-stick pans without damaging the surface.
Non-stick pans are coated with a compound called Teflon. This material helps to make delicious recipes. However, if the pan is exposed to high temperatures or scratched, food particles can get trapped and burned onto the surface.
Table of Contents
Easiest Ways – How To Remove Burnt On Oil From Non Stick Pan?
To remove burnt-on oil from a non-stick pan, start by allowing the pan to cool down completely.
Next, fill the pan with warm water and let it soak for a few minutes to loosen the burnt-on oil.
Then, add a few drops of dish-washing liquid to the water and use a non-abrasive sponge to gently scrub the affected area.
Baking soda is a gentle abrasive that can help lift the burnt-on oil without damaging the non-stick surface.
Another effective method to remove burnt-on oil is to use vinegar and water. Once the mixture cools down, use a sponge to wipe away the burnt-on oil.
4 Amazing Tips To Remove Burnt On Oil From Non-stick Frying Pan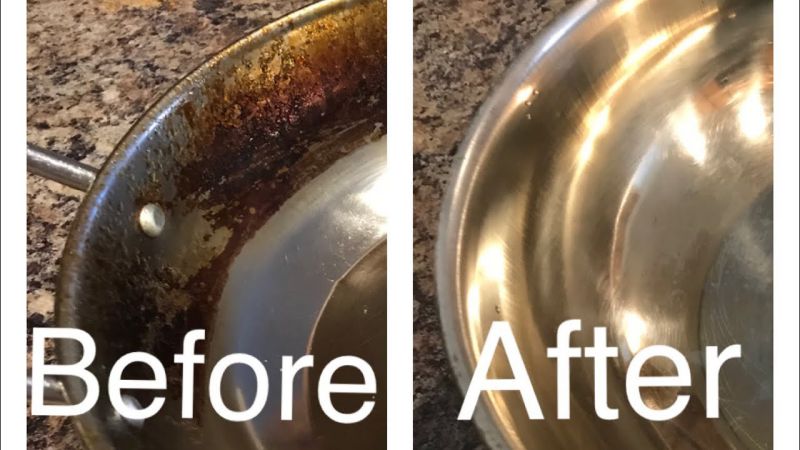
You have so many methods to get a clean non-stick pan after use. These are as follows:
1: Use Vinegar to Get a Clean Non-stick Pan
You can easily achieve that with just a few simple ingredients and steps from your kitchen pantry.
Ingredients:
- 1/2 cup of white vinegar
- Water
- Dish soap
- Nylon scrubber
Instructions:
- First, fill your nonstick pan with warm water and add the white vinegar. As the mixture boils, the vinegar works its magic, breaking down grime and grease.
- After a few minutes, you’ll notice that the dirty residue will start to float to the surface, making it easy to remove.
- Add a squirt of dish detergent and use a nylon scrubber to gently scrub away any remaining dirt or grease. The detergent breaks down any remaining residue while the nylon scrubber is gentle enough to use on your nonstick surface without causing any damage.
- Lastly, rinse the pan with cold water, and voila! You now have a sparkling clean nonstick pan that’s ready to use again.
- This cleaning method is a great way to keep your nonstick pans in top condition without using harsh chemicals or abrasive materials that could damage the surface.
- With the power of vinegar and the gentle scrubbing action of the nylon scrubber, your nonstick pans will look as good as new.
So next time you’re faced with a dirty pan, don’t hesitate to give this easy and effective method a try.
2: Use The Salt Water Cleaner To Remove Burnt-on Oil From Non-stick Pan
Maintaining the nonstick surface of your cookware can be a challenge, especially if you don’t know the right way to clean it. But fear not, we’ve got a cleaning hack that’s both effective and easy.
- To start, fill up a pan or pot with hot water and sprinkle in three tablespoons of salt.
- Leave your nonstick pan to soak in the solution for a few hours – perfect timing for you to catch up on your favorite show or take a nap.
- Once your pan has had a good soak, crank up the heat and bring the salt water to a boil.
- Then, dump the dirty water and give the pan a quick wash with soap and water to get rid of any remaining grime.
It’s important to remember that you shouldn’t use anything abrasive, like steel wool or harsh chemicals, to clean your nonstick pan. However, with this simple salt and hot water method, you’ll be able to keep your nonstick pan in tip-top shape.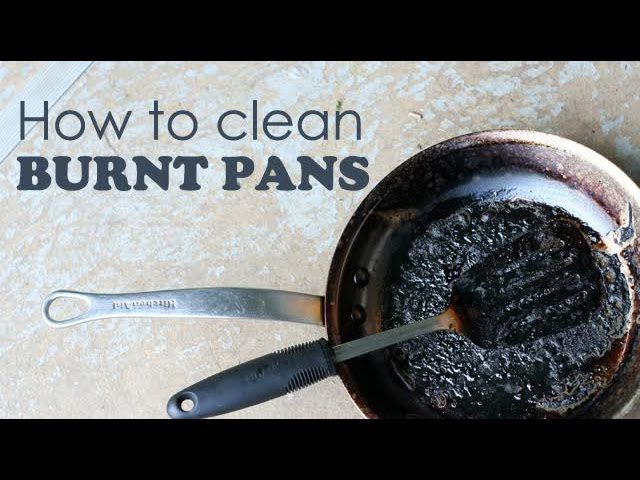
3: Use Homemade Nonstick Cookware CleanerTo Remove Burnt On Oil From Non-stick Pan
Cooking with a nonstick pan can be an absolute breeze, but only if you know the right way to prepare it before using it. To make sure your food doesn’t stick to the pan, you can create a nonstick coating by seasoning it with oil and salt.
Ingredients:
- 2 tablespoons olive oil
- 3 tablespoons of sea salt
Instructions:
- First, grab your favorite nonstick pan and place it on the stove.
- Turn the burner to medium heat, then pour in two tablespoons of olive oil.
- Don’t forget to add three tablespoons of sea salt or table salt to the mix, too.
- Swirl the pan to evenly spread the oil and salt mixture on the bottom. The salt acts as a natural scrubber, helping to remove any impurities and create a nonstick layer.
- Let the pan heat up for about 5 minutes or until the oil and salt mixture starts to smoke.
- Turn off the burner and allow the pan to cool completely before wiping away any leftover salt with a paper towel.
- Wash it with water. Now you’ll be able to cook your favorite meals without worrying about food sticking to the bottom of the pan.
This method is especially helpful for newer pans that don’t have a well-developed nonstick coating yet. Once you’ve seasoned your nonstick pan, you’ll be able to cook like a pro and make cleanup a breeze.
4: Seasoning Your Pan To Remove Burnt On Oil From Non-stick Pan
Seasoning helps to create a non-stick surface and prevent rusting, ensuring that your pan stays in great condition for a long time.
- Preheat your oven to 400°F (200°C).
- Grab some vegetable oil or shortening and give your pan a good rub. Make sure to cover every nook and cranny with a thin layer of oil.
- You just need to pop your pan in the oven. It will take at least one hour. This allows the oil to seep into the pan, creating a protective layer on its surface.
- Now you can simply turn off the oven and wait until your non-stick pan cools completely. No one wants to burn their hands, right?
- Once cool, give your pan a wash with warm water and dish soap to remove any excess oil.
- Hence, you can now rinse your pan with simple water and dry it with a towel.
- Properly seasoning your stainless steel pan will help it last longer and become more durable.
Related Posts:
- Idea To Clean Burnt Grease From Bottom Of Frying Pans
- Best Baking Pans That Don’t Rust – How?
- How To Clean Baked On Grease From Non Stick Pans
Conclusion
Are you tired of unevenly cooked meals and struggling with a pan that just won’t hold up? Say goodbye to those problems with the perfect non-stick pan.
Choosing a quality non-stick pan is the key to achieving an even cook, with a durable construction that can withstand high heat without breaking a sweat. Plus, who wants to spend hours scrubbing away at burnt-on oil? That’s why a non-stick pan with an easy-to-clean surface is a must-have.
But don’t let the fear of stuck-on grime hold you back. With a few simple cleaning tricks, you can easily remove any stubborn stains and keep your pan looking as good as new.
When you’re in the market for a non-stick pan, make sure you’re getting the best bang for your buck by choosing one with a solid warranty from a trusted brand. With a little love and care, your non-stick pan will be your go-to kitchen hero for years to come.